 Hi there everyone
So I decided to kick off my FESA sewing with the new to me Sewaholic Granville shirt and a bit of slower sewing. Two weeks later I still don’t have a finished item to show, but it has been an interesting journey and I think I have learned a bit more about dealing with fit problems!
My autumn plans are all about wearable basics and a white shirt is as wearable basic as it gets. Granville is a fitted shirt with princess seams at the back. I wanted to get a good fit and focus on all the shirt details – tower plackets, collar stand, edge stitching and flat fell seams!
I started with a test version (using an duvet cover) to check on fit and when I first tried it on I had a moment of thinking that it was absolutely fine, then I looked a bit closer and realised that it needed some more work! I started by cutting a size 12. I would probably usually have cut a 10 at the shoulder/bust and graded out to a 12 at the waist/hip, but I often have fit problems around the shoulders so I decided to give myself a bit more room.
I found several helpful posts about Granville fitting. The most useful for me was this post by Spiffy Stitches which I covered most of the adjustments that I needed. There are a number of other useful Granville fitting posts – including this one at Saturday Night Stitch and this one at Lavender Lane.
So these were the issues I wanted to correct:
Side seams wing out too far at the hip level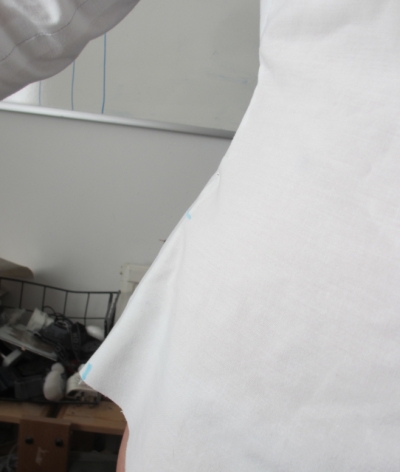
This was the easiest fix – I just folded out about half an inch from the bottom of the front and side back pieces to reduce the flare.
Bust dart was slightly too low – again this was an easy one – I copied the line of the original dart about an inch higher.
There was a lot of extra fabric at the back This took a little more thought. I curved the princess seam lines in on both pieces by about half an inch, tapering back to nothing above and below.
 Sleeves were slightly too tight and I couldn’t lift my arms fully.
 This was the biggest challenge and ended up being two adjustments. After looking at other posts – Spiffy Stitches in particular – I decided that the armholes were too low and the sleeve head was longer than I needed. I also wanted a bit more space at the back of the shoulder.
Firstly I raised the underarm seam line about half an inch – adding another half inch after that and taking in the side seam slightly above the bust dart. For sleeve head height I followed an adjustment from the Threads book ‘Fitting for Every Figure’ on sleeves to slash and spread and reduce height in the sleeve cap and widen the sleeve a bit – see picture below.
 This is probably the most work I have done on fitting – I was a bit overwhelmed by the number of adjustments I needed but I was able to put them all together into a second muslin. I was much happier with the result and I can move my arms!
  The back is also much improved but was so creased that you can hardly tell the difference in my pictures, so you will have to take my word on it for now!
The information I found in other posts was really helpful and gave me confidence to push ahead with changes I haven’t tried before – particularly raising the underarm and reducing the sleeve head.
So – after all this – which took well over a week in snatched sessions – I was ready to go ahead with the real thing. I have posted some of the details on my Instagram feed, but stay tuned for collars, plackets and flat felled seams and hopefully a well fitting shirt!
Anyone else faced some fitting challenges recently? I might be ready for some quick and easy sewing after this…


Great post. So much work but so worth it. Can’t wait to see the finished garment. I really envy you patience.
LikeLike
Thankyou – it was definitely more work than I had expected but I think I am (slowly) getting a bit more confident about making changes. I am nearly done with the real thing so hopefully it was worth all the effort – I feel as if I have been working on this pattern for weeks!
LikeLike
Wow, go you. I wouldn’t have known where to start with those changes. I love how the sewing community shares its wisdom. Good luck with the real thing and looking forward to seeing it.
LikeLike
I definitely rely on other fitting posts – its really useful to know that you aren’t crazy and other people have the same problems – and have helpfully posted clear instructions!
LikeLike
Well done getting the fitting sorted, I like to read fitting posts as much as the finished garment. 😀
LikeLike
Thankyou – it is really interesting to see a bit more about what goes into getting the fit right
LikeLiked by 1 person
Huge amount of patience & determination to get this far! I love this pattern – I haven’t made it yet but the epic fitting posts rather concern me!
LikeLike
There are a lot of people adjusting it! It is meant to be fitted so I guess you expect some adjustments but it was certainly more work than I was expecting – particularly on the sleeves which I have never tried to adjust before. Looking forward to moving on to a new project!
LikeLike
I always say that the hardest part of sewing is fitting, and you’ve done a great job on this. It’s definately been worth all the hard work. Good luck with your shirt!
LikeLike
Thankyou! It has been a bit of a slog but hopefully it will be worth it! I should really watch the Craftsy fitting courses I bought ages ago but I just haven’t got to them yet!
LikeLike
Definitely worth taking your time over this. I tend to mostly sew with knits at the moment, which eliminates the need for major fitting issues. I guess once you’ve made all of these adjustments, the pattern will be eternally useful though 🙂
LikeLike
I think so – I have plans for a second one but I think I will wear this one a bit first and see how I feel about the final fit.
Louise
LikeLiked by 1 person
Good job on the fitting! I’m still working on my pants fitting too! Isn’t it wonderful when you start getting close to perfect.
LikeLike
Thankyou! I don’t know about perfect – I still have such a way to go on learning about fitting, but hopefully it’s a bit better at least!
LikeLiked by 1 person
Well done on adjusting the shoulders so well. You’ve got a lot of patience to do all that work. Can’t wait to see the finished shirt
LikeLike
Thankyou – it is finally almost done! This was my first time adjusting shoulders – it isn’t perfect but better than the first version!
LikeLike
I sympathise with your need for all these changes and your desire for a bit of palate cleansing easy sewing! I’m sure the end result will be worth the effort and you’ll have a pattern you can use again and again.
LikeLike
Thankyou -I hope so! My worry is that after all the work I am still unhappy with the fit!
Louise
LikeLike
Unfortunately that has often been my experience, particularly with trousers.
LikeLiked by 1 person
I know that feeling!
LikeLike
I love a good fitting session post – thank you. It’s so useful to see what other people have found they need to adjust and how they did it. Hope you really get your perfect shirt out of it in the end.
LikeLike
Thank-you! I feel just the same – I absolutely rely on reading other fitting posts – the posts I referred to for this shirt gave me the confidence to try out different adjustments! I am pleased with the finished shirt – though I may still tweak a bit more if I make it again!
Louise
LikeLike